
Here is a photo from online that was my inspiration. The real version is available in England, made from used scaffolding and retails for just over $3,000.


For the wood shelves I used paint stir sticks from the local home improvement store. They are free and just required a little sanding on one side to remove the the printing. There are made of pine and a little warped, but I think that adds to the character.

The desk section needed to be wider, mainly to accommodate my vintage Durham cash register. I cut, sanded and stained the wood. The next step was clamping them together so that I could drill the holes for the pipe supports.


Here the stack is with two of the holes drilled.

Here are all of the wooden pieces laid out. The bottom shelf is on the bottom, the top shelf is on the top.

I added a drawer to the underside of the desk. These different pieces of wood show how it was constructed. Once I was all in place, I sanded and stained it to match.


Using a heat gun, I was able to bend the pipe into shape and let it cool. This sounds way harder than it actually is.

I cut the fittings from the larger pipe.

I cut the pipes to desired length, counted how many fittings I would need and also hole punched some cardboard for the area where the fittings hit the wall and floor.

I Painted all of the plastic pieces with an oil based hobby paint because I didn't want to take any chances of the paint not sticking to the plastic

Here was a dry fit. I put the unit together before I installed it in the shop.

Here is a view of the dry fit in the shop.

After glueing in, I decided that I needed to make the pipes a different color.
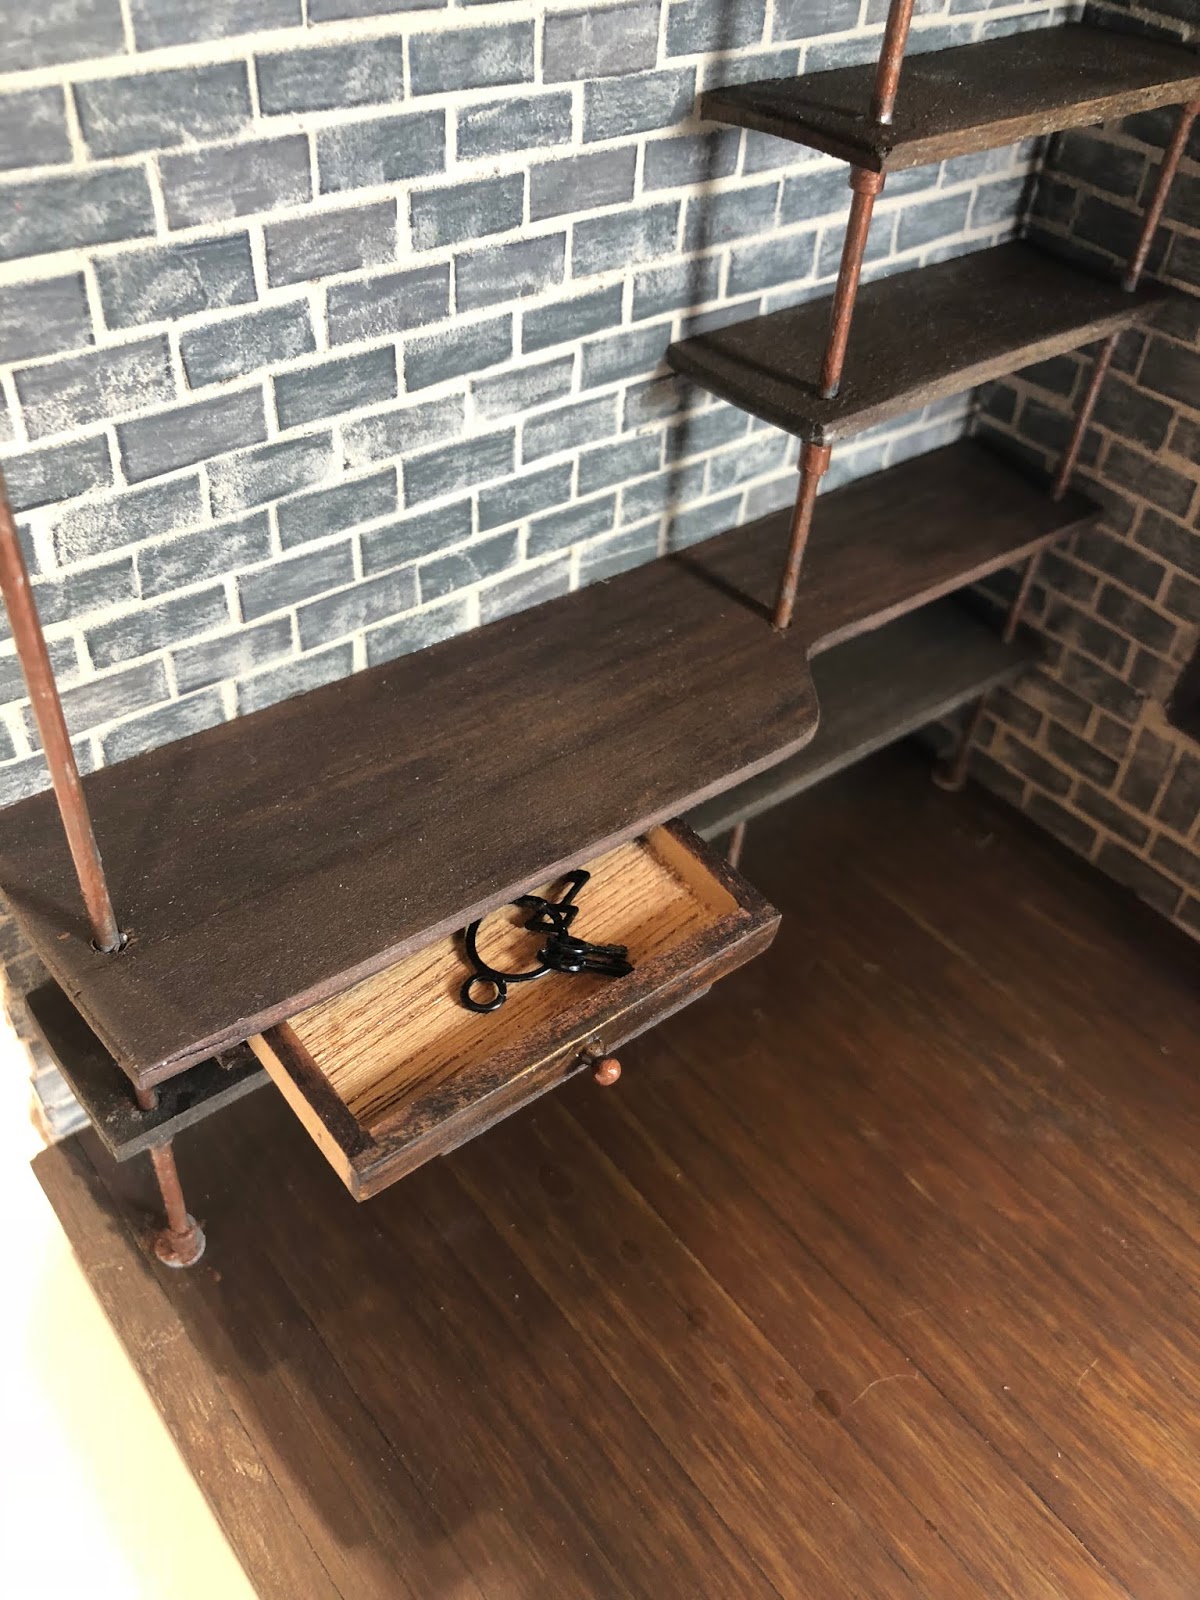
This shows the copper accent wash on the pipes and the built-in desk drawer.

I also modified a half round X-acto kit table by adding a bottom shelf to it for the display.

Here is another view. Still working on the placement of the copper and I have some items to hang on the wall.
Still a lot to do: windows, wall covering in the dormer, window coverings, and some exterior work. I think that we are making a light fixture in class?
To see how we got started on this project and the inspiration click HERE
So good, such a great way to showcase the items.
ReplyDeleteHello Troy,
ReplyDeleteThe shelving looks absolutely perfect. It works so well in the shop but does not cover the amazing finish you did on the wall. The dark stain really works incredibly well with the shop structure. I love it all.
Big hug
Giac
Hi, Troy - You did amazing work on the shelves and desk for the copper shop. I think the design is perfect, and the color you decided on for the pipes is just right with all the copper pieces. (Although I also liked the original gray paint.) The dark finish on the wood pieces is just the thing to add a mellow, rich look to the shop. I love that old cash register, and you've displayed it to perfection against that brick wall. The two-tiered table is another perfect piece - an ingenious idea! I can't believe how the shop just grows more and more interesting with each post - I can't wait to see the finished piece. Great work!
ReplyDeleteMarjorie
This is great Troy! I better get busy on mine. Still don't know what I am going to make mine......
ReplyDeleteYour industial/steampunk shelvling is SUPER COOL Troy!
ReplyDeleteIt really fits the shop space as well as your theme to a "T" as does your cleverly modified half round table- WOW!
Me encanta el estilo industrial que le has dado a la estantería y a la tienda en general,te ha quedado preciosa,gracias por el tutorial!
ReplyDeleteBesos.