My Little Corner of the Net

Showing posts with label Cabin. Show all posts

Monday, September 25, 2017

Cozy Cabin Door Hardware

I had a little time this evening to install the door hardware in my cabin project.

Here is the door to the downstairs bedroom in the kitchen


Here is the door inside the downstairs bedroom

Here is the inside of the front door (still need to trim this one out)

Here is the front door 

Here is the back door

To see more posts about my cabin, click the cabin label below


Thursday, September 7, 2017

Cozy Cabin Back Door

I completed the back door to my cabin project. 


This was the template that I used for the door from a drawing that I did in AutoCAD.  I am still undecided on the number of divisions for the window.


Just like the front door, I started with a single piece of wood then cut out the window opening.


I added side and bottom rails to the door


Since this is a dutch door, I cut it in two


I scored the wood to make it look like more than one piece of wood and added some more trim pieces to help it relate to the design of the front door.

I used the template to cut smaller wood pieces for the window divisions


Here is the door with the first coat of stain

These are the side trim pieces


I used pins as the pivot hinges

  I used a rubber band to hold it in place while the glue dried.  I have ordered some hardware, and I will update when it arrives.


Here is video of the front and back doors to give a little context.

To see how I built the front door, click HERE  You can click the Cabin link below to see other posts related to the cabin.

Monday, September 4, 2017

Cozy Cabin Front Door

I spent some time building a front door for my cabin project this weekend.


I spent a little time, mainly on Pinterest getting some ideas.  The white paper cut-out was my original concept from back when I started the project. 

  I started by cutting a piece of basswood the size of the door and cutting the window opening out.  This cabin was a kit, so the door openings are not a standard size.
 Then I cut the side pieces and the cross member and glued them to the door on the front and back.  
I scored lines to give the illusion of many pieces of wood instead of a solid piece.  Then did a dry fit, and glued it all together with craft glue.

I tried a new product "gel stain" available in the craft paint section.  You paint it on, let it sit for a while, then wipe it off.  It is water based and cleans up pretty easily.  It was a lot easier than oil-based wood stain.

 I glued on some metal straps that I had picked up a craft show and added some mini-faceted beads to give the illusion of iron rivets.  Then coated the entire thing with a clear coat.  It is a little more glossy than I would normally do, but live and learn.
These are the pieces of wood that I cut for the frame.  I set the door inside, and used pins for hinges at the top and bottom, then glued the frame in place.  The pieces on the paper are for the exterior trim.


Here is the door glued in place.  I have ordered a door latch and will update after it arrives.  The rocks around the front of the cabin are still a work in progress.


I was originally going to try some stained glass for the window, but I think I will stick with clear.  I have also been debating painting the trim to match the windows.

To see additional blog posts on my cabin, click the cabin label below.

Saturday, September 24, 2016

Recent Acquisitions


I have picked up a few things here and there over the past few months.  Including this curious ceramic dog.


I came across these miniature boxes at an estate sale for a few bucks each.
The one in front is silver (and needs to be polished!)  It also has glass beads in the top


Below is a photo with each of the boxes open.
The silver one has some sort of white enamel inside and the one with decorative scrolls is lined with red velvet.


 I came across these small ceramic pieces at another estate sale


I purchases these tobacco felt rugs on Ebay.  To read more about my tobacco felt rugs, click HERE 


I was able to find a couple of more resin "Take a seat" chair by Willit's.
This first one is called the Slipper Chair and is a reproduction of a chair from 1880.
It has tiny gold tassels and brass casters on the front feet.  The description with the chair says: Wide enough for a Victorian lady's dress with its ample layers of petticoats, the well-cushioned Slipper Chair often found it place in the boudoir.


The second Willit's chair is called the George Washington Presidential Chair circa 1790.  The description for this chair reads:  In 1790 George Washington purchases this dignified, revolving desk chair, originally known as the "Uncom[mo] Ch[ai]r" from Thomas Burling, a New York cabinetmaker.  The seat turns on a central spindle over bone rollers, one set it to the top of each leg. This miniature reproduction actually turns also.


To see the rest of my Take a Seat collection click HERE 
There are some more HERE too!

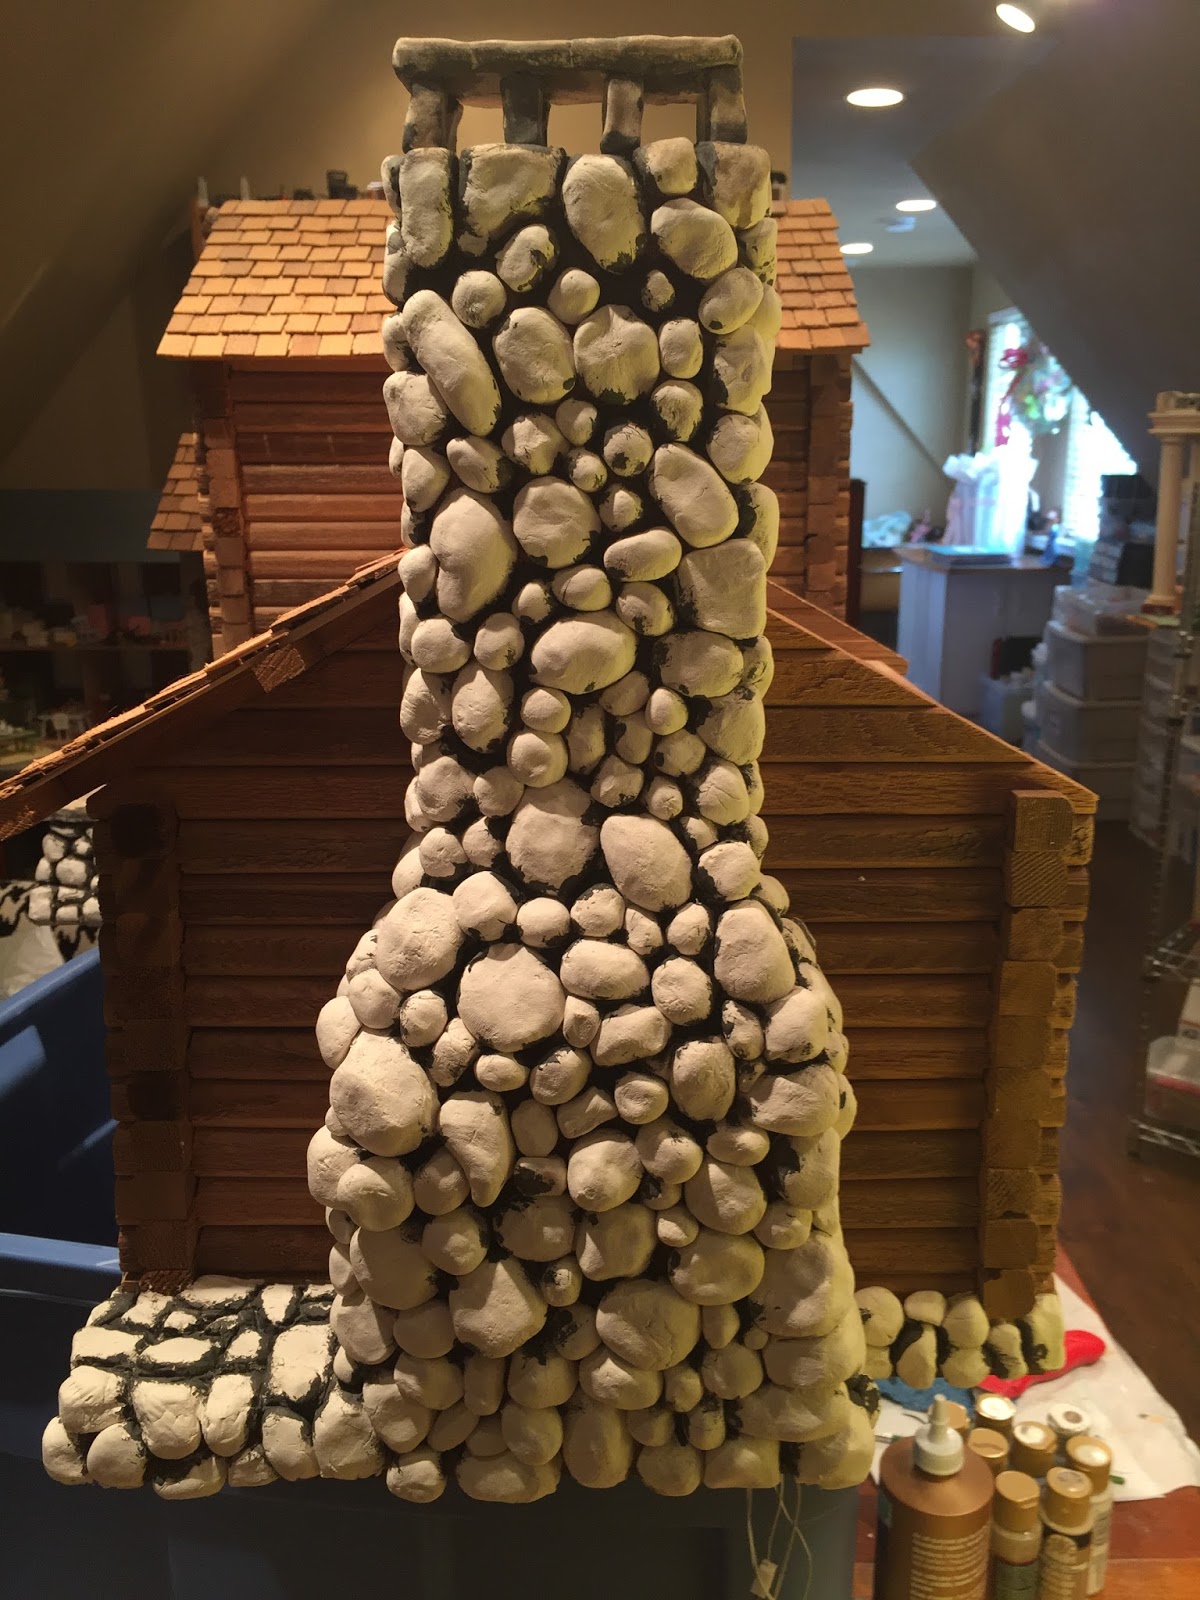
Work is continuing on the Cozy Cabin.   I have painted all of the 'in-between" places with a mixture of medium and dark grays.

Sunday, September 4, 2016

Cozy Cabin Progress

I had a little time this evening to step back and look at my cabin progress. 
(and play a little!)


I painted the rocks on the bedroom fireplace last night and wanted to see how it looked with the furniture.  This is the color scheme I settled on after a few days of playing around with paint.

 I have had this bed for many years.  I selected it for the cabin because I liked how it matched the floors and the headboard design reminded me of an old wagon wheel.  The only thing I didn't like about it was the floral fabric that it came with - but that is an easy fix.

I have been holding on to this fabric.  I liked it's quilt like look.  The only think I am not  too fond of is the giant hearts - Again an easy fix in my mind.


After some creative cutting and gluing.  This is where I ended up tonight.  I might do something more creative later on and turn down the quilt to show some linens or maybe a simple bed skirt or a throw pillow?


Then I had to try it out in the room to see how things were going to look with the color of the new rocks and the furniture and accessories I had slated for this room.


 I tried a couple of furniture arrangements.  I think I like the one below


Friday, September 2, 2016

Cozy Cabin Stonework - The End Is In Sight

I finished putting the stone around the cabin today


Here is an shot of the entire length of the cabin.


This is where I left off yesterday and picked up today, near the fireplace in the bedroom (to the left)


These are the blocks that the Paper Clay product comes in.

This shows the back porch off the living room.

Here is a shot of the fireplace in the bedroom.

Here is the fireplace in the living room.

This next week I am going to experiment with different color combinations of paint for the rocks and grout.