My Little Corner of the Net

Sunday, March 3, 2019

Shabby Chic Cabin Update

I have made a few updates to the Shabby Chick Cabin so I thought that I would bring everyone up to speed.
 

When I left off at the sink, I was at a point where I needed drawer pulls.  I had some heavy duty foil left over from a knife making project at the Tulsa Miniature Club.  I titled the picture "foiled again" because they were just not looking to great.


I opted for a my stand by, and ordered a faucet and drawer pulls online from Miniatures.com.


Here is a picture of the sink all glued together with all of the drawer and door pulls installed and the faucet in place.


Here is a picture of the cabinet in it's place in the cabin.

I added a few accessories to see how it looked.  The rough hewn ladder came with the cabin kit.  I added a little white-wash.  The side table with the antique coffee grinder is a vintage piece (circa 1950's) by a company called Toncoss.


Here is a photo of the loft.  The majority of the space is taken up by a big brass bed ( a local estate sale find) all decked out in comfy white linen.

 I envisioned  the corner space of the loft as a place where the owner of this she-shed likes to escape and work on crafts including sewing.


Here are some views of the lower level


I chose a family picture from my daughter's wedding this summer over the fireplace.


Here is a view of the front porch.


I may add a ceiling fan to the porch and maybe some curtains to the windows.

Thursday, February 28, 2019

Tulsa Miniature Club Project

This month at our local miniature club meeting, we put together these bird cage wall hangings.


 We started with the pieces shown below,  a laser cut bird cage, a small piece of wooden rain gutter, and some scale plastic plants.

After some light sanding, we glued the pieces together with craft glue.
I think that I will probably use mine in the Shabby Chic Cabin that I am building.

There were quite a few varieties, here are some of the different class members' projects.

 Each participant had a different take on how to arrange the greenery.


Tuesday, February 26, 2019

Cozy Cabin Farm Sink

I came across this 1:12 scale hutch at a yard sale a while back.  

It has some issues including a couple of the doors that are no longer connected and some missing door knobs, but it has good bones. I decided that it would be a good kitchen cabinet for the cabin project.  I have gone back and forth wondering about putting a sink in the cabin or not. One of the challenges I face on miniature projects (due to my architectural background) is how far to take a project to make it real.  Often times this involves projects not having stairs, or bathrooms, or fireplaces that are not stacked.  The struggle is real!

I started by removing the hutch top from the base.

I decided that it would be less work to eliminate one of the drawers in the base cabinet and center the sink.  I could also move the small drawers at the top to make room for a faucet.


I used my dremel tool to make the cut.  

I decided to build the farm style sink out of wood (it is made from paint stir sticks from the local home improvement store)

I cut the pieces and dry fit them in place.  Luckily I placed the hutch on top because the opening in the hutch is a little smaller than the hole in the base cabinet where the drawer was.

The sink involved a lot of sanding


I decided to move the small drawers up to be level with the upper cabinet doors.  I also filled some of the holes with lightweight spackle.  Hopefully that will work - typically I would use wood putty.


This shows the painted sink in it's place.

I decided to add a small grommet in the sink to give the illusion of a drain.


I kept the cabinet color green and put the white crackle finish over it. This is the finish that I have been using on all of the other wood in the cabin.  I figured a little green showing through might give it a little character.  I have a faucet on order and I want to make some cabinet pulls for the drawers.  Stay tuned!

Thursday, February 21, 2019

Shabby Chic Cabin Chimney Update

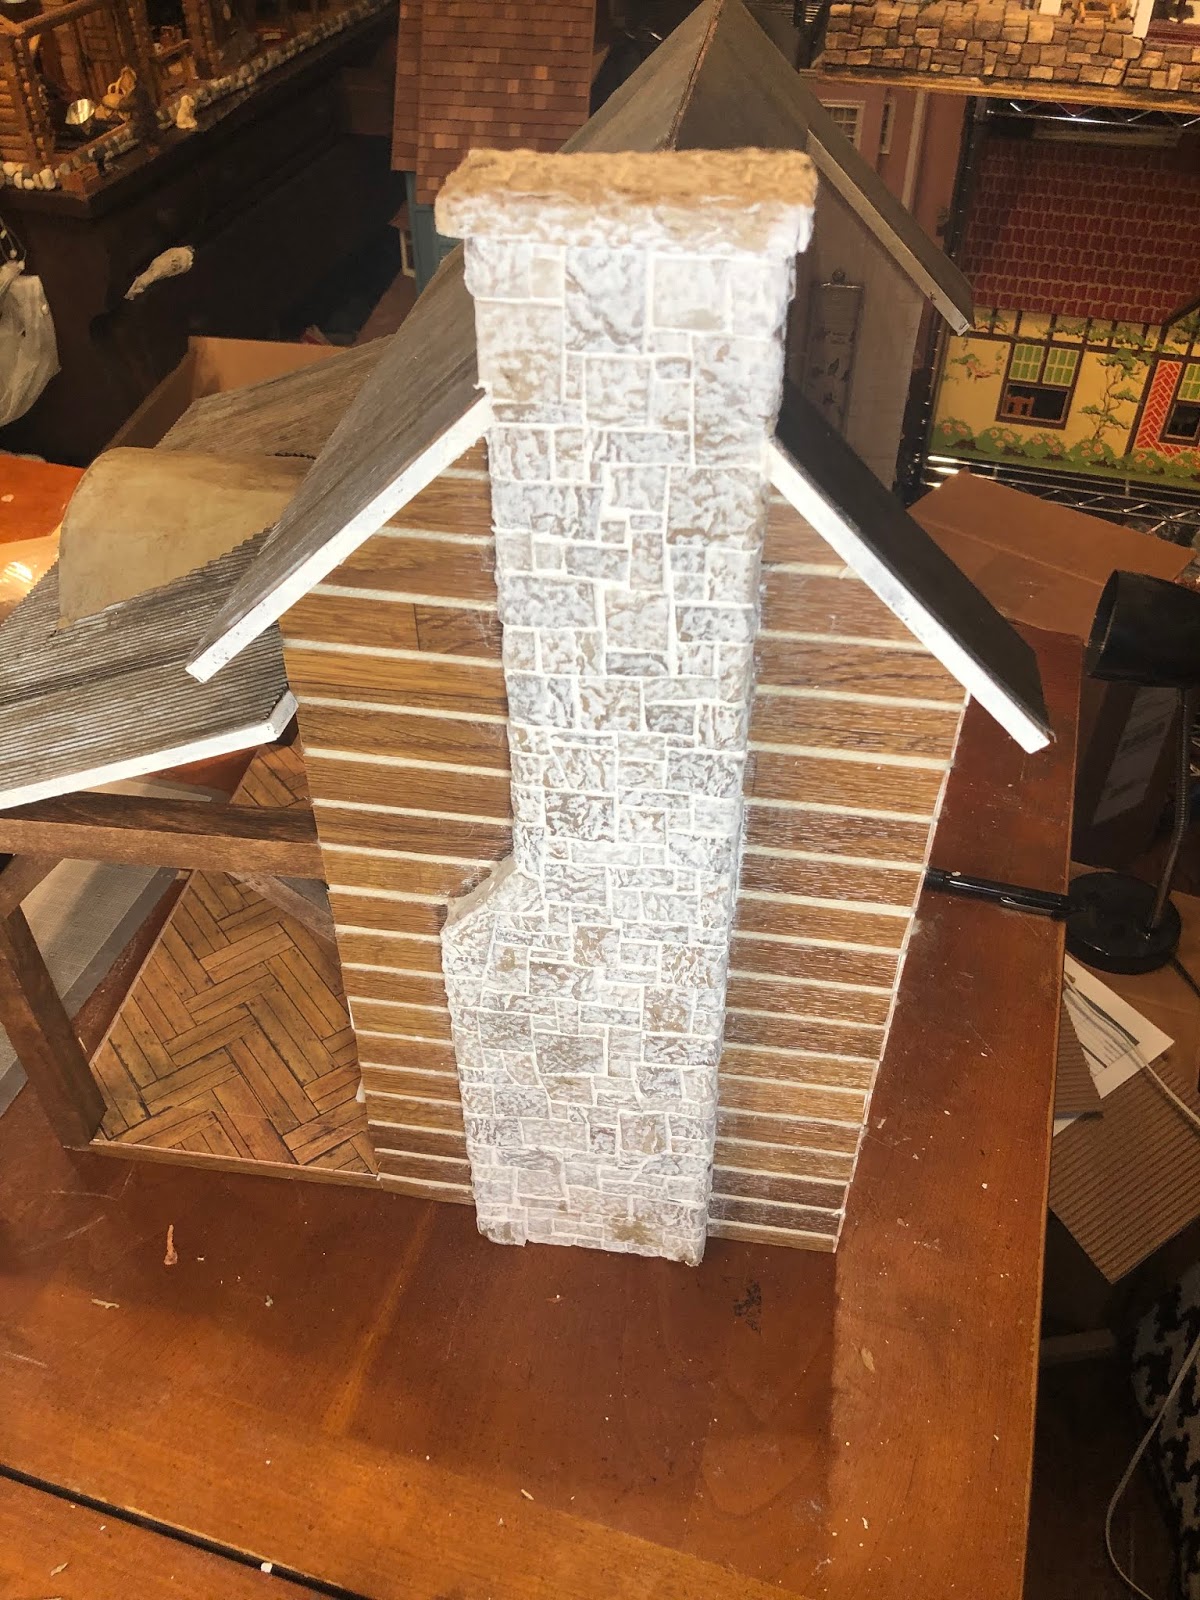
I think that I have finished the chimney on the Shabby Chic Cabin project.  I'm very pleased with the way it turned out.  You may recall that I made the "stones" from textured recycled packing cartons, it is similar to egg cartons but more textured.


 After all of the stonework was complete, I painted each of the stones with craft paint.  I did receive advice that it was important to seal the work.  I understand why because the material starts to get a little mushy when it gets wet.  I ended up sealing with Mod Podge.  (I used mat finish)

Here is a picture of the Mod Podge drying.

The next day, I started the grouting process.  I made a mixture of fast drying spackle, craft paint, some craft glue and a little water.  I worked the mixture into each of the crevices with some clay working tools and wiped off the excess. 
I had used this process in the past with some thick paper brick and it wiped off the brick pretty easily, however, the textured stone on this project was more textured and it didn't really wipe off.  I started with Kleenex, them moved to paper towels, then wet paper towels, (which started to become one with the stone) so I switched to damp rags.  To be honest I was starting to worry.  Luckily the walls are covered in vinyl flooring.  
I also used painters tape to tape off the roof as I worked my way around the top of the chimney.

So here is what I ended up with.  You can see that some of the stones were starting to become mush (towards the bottom).  I figured that I would just let it dry and see what happens.

The next day - the grout looks good, I was modeling the stonework after the inspiration photos below (from Pinterest) I was thinking that It just looks like the stone was white- washed, so I decided to touch up the stonework with some paint.


I used light washes of craft paint in browns and grays to try and match the photos.  It turned out pretty great!

I decided to drill holes for the chimney pots rather than just glue them on top.  I may or may not have started singing Chim-Chimney-Chim-Chim-Cher-ee at this point - wondering how Bert would clean this fireplace?

I decided to go with small wooden spools for the chimney pots.  I drilled the holes larger and painted them a metallic color, then tamed that down with some brown washes - the same technique that I used on the roof.

Here is the bird's eye view

And here it is all finished!  

Tuesday, February 19, 2019

Recent Acquisitions

I have come across a few more miniature finds.  This last weekend at the Tulsa Vintage Show, I picked up this 1940's patio furniture in nearly mint condition.  I also purchased the tiny metal balustrade at the show.

I came across a few interesting thimbles at a local estate sale.  The dark blue one is wood and has colorful flowers painted on it, the brass one has an embroidered border and is labeled "Made in Austria", the one on the end is crocheted.  They will make excellent waste paper bins. The two metal place card holders are from another estate sale.  The two metal planters might go great with the patio set and some appropriate scaled plants?
The vintage cast iron table was a local antique mall find and is most likely a reproduction from the 1970's.  To see similar cast iron pieces in my collection click HERE

The cast metal (lead?) balustrade is marked "MADE IN ENGLAND BY BRITAINS LTD LONDON" on the bottom and has a number  "No 61"  I'm not sure what it is, but I think I might try to use it for a Victorian type fire place fender or perhaps in a garden.  The sales person said they were from the 1930's or 1940's.

I purchased these two miniature plates recently on Ebay after a tip from a friend.  
I believe that they are Napoleon Bonaparte and his second wife Marie Louise, but I am not positive. 

The plates are Limoges


The patio set is marked PLASCO TOY on the bottom.  
I had not seen one in this color before.


It kind of makes me long for spring! 

To see more of my plastic furniture by Renwal, Plasco & Reliable click HERE